Dec. 18th, 2018

potofsoup: (Default)
[DW for tumblrites masterpost]

Wow. This is the last post of this series!! (If there's some other feature or functionality you want me to write about, please leave a comment!)

Anyway, Paid Accounts.

The checklist of Paid Account features isn't that easy to find so here it is: https://www.dreamwidth.org/support/faqbrowse?faqid=4

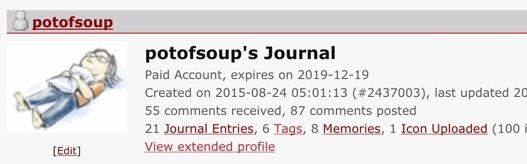
As you can see, you get more icons and more stickies. If you scroll down, you see that you also get some advanced features, including:

Polls
Taking polls on things is fun! People also use polls as another way to do Kudos, which I've done at the bottom of the post as an example.
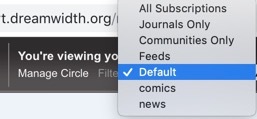
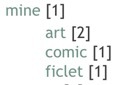
Tag Filtering
Whitelist/blacklist tags by people

Ability to Search All Text/Comments
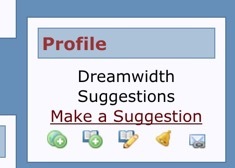
Helpful for your own blog! Or, you can gift a paid account to kinkmeme communities!


So... I used to be like "ugh, I don't actually need any of this, I'm not going to pay". But now I'm like "I want DW to continue to be viable!" so I spring for a paid account, even though it doesn't have most of the stuff that I *want* as paid features, such as an image gallery system, or more image hosting.

To get on my soapbox for a small moment --
I know that not everyone can pay -- being a teenager sucks, and capitalism also sucks. That said, I think it's important for those who can pay to pay so that people who can't pay can continue to use the service.

ALSO: servers cost money. Hosting fandom, with all of our yelling and image spamming, costs money. Back in the Angelfire/Geocities days, you paid for it with mandatory banner ads on your website, or you paid for a website out of pocket. Then "Web 2.0" startup companies figured out a way to convince investors to give them a lot of money upfront, with vague promises to start "monetizing" after they’ve built up a userbase. And if they can't monetize, the Tumblr Purge happens. They don't actually care about users, except as a way to attract more money from investors or advertisers.

So we gotta pay, if we can, so that we're not just numbers and data. (Until the p2p and federated fandom stuff happens, at least.)

Did you know:
- You can gift paid time to other accounts! That could be to a community, or to someone else!
- There is a 10% discount in December! http://dreamwidth.org/shop

Open to: Registered Users, detailed results viewable to: All, participants: 42


Like this post:

View Answers

❤️
42 (100.0%)

potofsoup: (Default)
[DW for tumblrites masterpost]

One of the things that I absolutely loved about tumblr were the sideblogs. It meant that I could post whatever I wanted, and people could opt in to my stuff, based on content type. Before tumblr deleted my account, I think I had ... 19 sideblogs? About 5 of them were for various events that I modded, one was a translation blog, 2 were for my original comics, and then there were the refblogs, the personal blog, the fan blog, the let's read blog that I had planned on returning to... you get the idea.

So, how do you make sideblogs on DW?

Answer 1: Communities
You can create a Community by going to Create -> Community. The great thing about communities is that they're basically like another blog that you can post to, with some pretty advanced customization and modding abilities. Check out some of what you can do:


You can run events with communities with multiple mods and a specific page of guidelines. OR, you can create a community of just yourself, where you post pictures of dogs. You can tag your community to make it searchable, same as any blog.

And posting is easy, too! You just go to the regular posting page, and pick from the dropdown:


Voila! Now people can subscribe or join your community!

BUT: one downside of using communities as sideblogs, is that you are always posting as your main account. Sure, I can use a different icon if I'm posting to a specific community, but the username of the poster is still potofsoup.

Which is why:

Answer 2: Make another account
For example, for fandom events or kinkmemes, there is usually a separate mod account. I compartmentalize like whoa, so I have my fandom account (potofsoup), but also a personal account (summercomfort), which I will use to create comms for my original art.

To keep 2 accounts straight, I recommend using your secondary account with a separate browser. However, if you, like me, need to also be logged some the mod accounts, I recommend using Chrome's profile handling system. It makes toggling between things super easy!

Of course, there's also:

Answer 3: Keep everything on the same blog and tag carefully
For example, instead of having a refblog, you can just post things as "Private" and then use Memories or Tags to track them. Or, instead of having a separate sideblog for your funny bird pictures, just put them on your main blog and tag them properly. Content moves slower on DW, so I personally don't mind a bit of blog merge.

Does DW have a way of blacklisting tags?

Answer: yes, and no.

If you're a free user, the answer is no. (See the Dash Curation post about other ways to filter your Dash) BUT, if you're a paid user, the answer is a resounding YES.

I'm going to put it behind a cut tag because it's paid-only, but IT IS SO BEAUTIFUL.
Expandthe beauty )

Anyway, it's a paid feature, so I know not everyone has access to it. It *has* made me more eager to tag things properly, though. it's why I've been tagging my reblogs
potofsoup: (Default)
[DW for tumblrites masterpost]

All right, so you're settling into your DW blog, but you want to make it look prettier. This is where Styles and Themes and Layouts come in. I'm not super good at it myself, but here goes:

To start, you need to pick a theme by going to Organize -> Select Style. There's a lot! Over 1500! BUT: if you click on "Base Styles", then there's actually only 58. These are the core style families. So now, instead of 1500 to choose from, there's 58.

At the bottom of each, you see the creator and the name of the base style. If you click on the base style name, it'll show you all the variants of that style. For example, "Ciel" has 80+ variants, made by various people:


If you find yourself liking a particular creator, you can also browse by creator. When you click on the little magnifying glass on the corner, it loads up your journal in that style.

Since you can easily tweak the colors later, the stuff I generally look for are the relative placement of things:
- Where is the usericon placed, relative to the text?
- Is there a good handling of the header bar area?
- Does my reading page look good?
- When I shrinkify it to mobile size, does it look good?

Before you run off to browse through the base styles, I actually went ahead and clicked on all 58 of them and tested which ones degrade well when I shrink my browser window to phone-sized. Only 16 of them didn't pass the "eh this doesn't look that great" test. Which means that almost 3/4 of them did!

ExpandThe 16 less-mobile-friendly ones are: ) (And note that these are just the base styles that I tested. It might be that a variant is totally fine.)

After you select a theme, then the customization can begin! (Go to Organize->Customize Style). You can change basically everything about it -- upload new header or background images, change how many columns you want, change the font or the standard titles of things, change the colors, etc. There's even a "Custom CSS" section where you can override the current style's CSS with your own. There's a whole DW community dedicated to helping you with that: [community profile] style_system

... or, you can find a "layout" that someone else made and follow the instructions from the layout creator (which mostly involves copy-pasting a chunk of code into the Custom CSS area.) You can find mobile-friendly layouts at the fluid layouts tag of [community profile] dreamwidthlayouts, but I also want to pimp [community profile] myrtillenne's layouts because they are stunning: https://myrtillenne.dreamwidth.org/tag/dreamwidth

After you get your theme set up, you may want to double check it on mobile, which brings us to:

Using DW on Mobile
There's no app, and frankly, given that the whole tumblr thing is in part due to Apple app store stuff, I don't really want there to be a DW app. But how do we make the mobile DW experience better? Since the themes are actually pretty mobile-friendly, the main challenge is actually navigating through the DW website to get to the reading and post pages. Solution: make bookmarks. Most browsers even let you save a bookmark as a shortcut icon you can click on your home screen.

But if you're looking for a slightly more streamlined experience, here's what I've got set up:
1) A dedicated browser for DW, with the only bookmarks in the browser links to my core DW functions. This means that opening that browser is like opening a DW app.


2) A way to do split screen with the browser, so that I can scroll through my reading page, then quickly pull up my post page to make a quick "reblog" post.


ExpandHere's how I did it on my Android 6 )

Note: the beta posting interface is more mobile friendly, and looks like this:

You can activate it by going to Organize -> Test Beta Features.

I personally decided to keep mine the normal way because (a) I don't plan to post too much via mobile, and (b) sometimes I want to use the Rich Text feature, but YMMV.
potofsoup: (Default)
[DW for tumblrites masterpost]

A lot of people have talked about this elsewhere, but here's the low-down on DW tags:

1) There is a tag limit. (1000 for free, 1500 for paid, 2000 for premium)
This means ... don't tag-spam?? As someone who used to write entire secondary blogs in my tags, I'm super sad about this. But here's my post about alternatives to tag-yelling.

2) Tag Management is Amazing
If you go to Organize -> Manage Tags, here are some things that you can do:

- See stats for each of your tags -- how many times used, how many private or public entries, etc. (btw if a tag only exists on private entries, it doesn't show up in your public tag cloud)
- Bulk rename tags (automatically renames it on all the posts)
- Merge tags


3) Tag Display Options: List, Cloud, Multi-level
Your tags are displayed on your Tags Page (https://potofsoup.dreamwidth.org/tag/), and as an optional box in your sidebar on your blog. You can tweak the way that tags are displayed under Organize -> Customize Style

Under the "Presentation" Tab, you can customize how your tags page is shown:


Under the "Modules" Tab, you can customize how your tags show up on your blog:

(The default here was 50 tags shown, I dialed it down to 15)

List and Cloud are pretty self-explanatory. The Multi-level looks like this:


The way you make this happen is to put a colon (:) between the different levels. For example, if I post a comic, I might tag it as "mine" and also "mine:comic", so that it shows up as both. You can go multiple levels!

4) Tag Searching
So... you can search for multiple tags. I haven't been able to find an interface for it, but the URL edits are pretty straightforward -- add a comma between the tags, and add a ?mode=and if you want intersection.

https://potofsoup.dreamwidth.org/tag/keep shows the posts I've tagged "keep"

https://potofsoup.dreamwidth.org/tag/reblog,keep shows the posts that I've tagged "reblog" OR "keep"

https://potofsoup.dreamwidth.org/tag/reblog,keep?mode=and shows the posts that I've tagged "reblog" AND "keep"

5) Tag Filtering
Whitelisting and blacklisting tags by person is available for paid accounts! I blab about it here: https://potofsoup.dreamwidth.org/9164.html#cutid1
(And apparently there's a 10% discount on paid accounts every December)
potofsoup: (Default)
1) There's really no way of keeping track of what I've submitted to [site community profile] dw_suggestions, so I'm going to just briefly list them here:

----> a list of image-related features that I'd gladly pay for:
--------> more server space
--------> image tagging/gallery hosting
--------> a "whitelist" of sites that I can hotlink to (such as AO3)

----> an ability to do a "quick post" from the Reading Page. Basically, having a link next to "Reply" that brings up a quick post box, the way clicking on "Reply" brings up the quick comment box.
--------> I see this as a DW-friendly way of making the spreading of cool stuff easier, without going all the way to reblogging. Imagine scrolling down your dash and seeing something cool -- it'd be a pretty quick way of making a promo post linking to it, or copying a meme format, or whatever.

(BTW, I think people should submit things to the comm -- even if it's a very similar idea, it gives the developers a sense of how much people want a certain feature)

2) I am determined to make DW work! Here's what I'm doing:
----> I'm making sure that I'm consistently here, so that there is something for others to follow
----> I'm also slowly working down the MCU Fandom Lifeboat list of DW usernames and following a bunch of people. Even if those people's blogs are obviously just placeholders, I'm hoping that the very fact that I'm following them will tell them that there *is* an audience for their work on DW.
-----> OMG I love the quick comment feature, it's so great. I can scroll down my dash and just yell at people. :D!!

3) 2 quick links:
[personal profile] caramelchameleon 's post about Spider-Ham made me laugh and laugh and laugh: Are There Any Artists At Marvel Who Can Draw A Pig

I've been following Cat and Girl ([syndicated profile] catandgirl_feed) forever, and their comics always toes that fine line between scathing social commentary and absurdism.

4) Hey, are there any folks who are still posting on tumblr that I should import as a feed?
potofsoup: (hi)
[DW for tumblrites masterpost]

One of my favorite things about tumblr is all of the yelling that goes on in the tags. The stream-of-consciousness asides. The whispertext and the flailing. Sometimes entire ficlets get written in the tags. (And remember the days when the tags couldn't be reordered?)

So... how do you yell in the tags on DW?

Well, I guess, technically, you can still just do the yelling in the tags. Problem is, tags are actually properly sorted and counted on DW (more on that later), so you might not want to corrupt your tagging system.

Here are some other options:

1) Styling Text
A simple way is just by styling text differently. Use <small> or <s> to style text, and throw it at the end for good measure.* There's also <i> for italics, or even <font color="gray"> if you want to get even quieter. just remember to nest your tags and close them

2) Adding a comment to your own post
If you want to talk about something even further removed from the main topic of the post than usual, but don't want to create a separate post for it, you can throw it into a comment to your own post. I have two worries about this: (1) there's no good way of marking those comments as different, so people won't know that you were adding subtext, and (2) clicking on comments involves leaving the Reading Page.

That said, you can totally say something at the end of a post like "related yelling in the comments" and basically fork your own post via comments. I think it's a good way for when you have a whole other branching idea that you want to present.

3) Using the Mood box
There's a box for selecting or typing your mood, and that gets put at the bottom of the post. Sure, you can select some mood icons here (Organize->Customize Style->Display), but you can also just type some text in there. Pros of this is that it shows up in the same place as tags. Cons is that you're limited to 30 characters.

4) Using icons
This one is probably a bit weird for tumblrites, since we're used to having only 1 icon. On DW, people usually use icons to express different moods or situations. For example, if you're feeling yelly, you might use a yelly icon. Or if you are talking about a specific ship, you might use the icon for that ship. You can even choose icons when posting comments.

The fact that icon-picking is above the posting box, enabled with every comment, and factored into the paid tiers really shows that this is the DW-native way of expressing nuances of mood and providing an extra layer of subtext. (And RPers use icons to represent their characters!) When you click on someone's icon, you can see their entire icon set. (Try clicking on mine!)

Go to Create->Upload Icons to add new icons. [community profile] graphics is a community where people share their icon sets, if you want to grab some pre-made ones.

Here are mine:


5. Cut tag
I think adding a additional cut at the end of the post is a good way to deemphasize what you're saying but also indicate something is there. I recommend putting the cut text as something small, like a period or an arrow.

Expand. )

---------
* Footnotes are another good way. i've been using these for a while, and the smaller text helps but sometimes it's still not enough flailing
potofsoup: (Default)
[DW for tumblrites masterpost]

I think one thing that we're not particularly used to, coming from tumblr, is the Profile page. It is easily accessible on a hover-over, and it has a lot of information!! But the information that we're used to seeing (quick blurb, relevant links) is buried half-way down the page, and not on the top or sidebar of your blog, which is where people expect to find it.

So, here are the solutions:

1) Stickies
A Sticky is basically a post that is pinned to the top of your blog. You make the post like usual, and then you make it sticky. There are 2 ways to make it stick. The "quick-and-dirty" way is to pick a post-date far in the future, like 2030 or something. The actual way to do it, is to go into Organize -> Manage Account

Go to "Display":


Then scroll to the bottom, where there's a Stickies section:


2) Custom Sidebar Text
This takes a little bit of finangling, but here's what it looks like:


The quick version is: Turn on "Custom Text" in your style modules, and then write whatever you want.

ExpandHere's step by step instructions: )

ASKBOX
Similarly, DW doesn't exactly have an Askbox. But since people can comment on entries, it's actually... not a big deal?

Anyway, solution 1 is to just send messages. If you hover over the username's icon, a hover menu pops up, and one of the options is "Send Message". Click that and you can send someone a message, which they can respond to you privately. (You can control who sends you messages by going to Account Settings --> Privacy)

But what if you want people to send in anon asks? The answer is: Screened Comments. At the bottom of your posting page, there's a place where you can fine-tune your comments:

Basically, whatever comments you choose to screen becomes private, visible only to you. You can also reply to screened comments, and those are *also* private! You can also choose to unscreen (make public) any comments later on.

Expandhere's what it looks like )

This is actually a *lot* of flexibility and control, and you can use it for *every post*! You can decide on a case-by-case basis whether you allow anon comments, whether you default to having the comments private. You can also go through later and freeze a comment thread, or hide certain comments. So instead of a single askbox where lots of different messages might be coming in, you can have, say, an meme askbox, or a drawing prompts askbox, etc etc.

You can also use this comment system for @mentions. It's some extra effort, but if someone writes a post that @mentions you and they want you to know, you can ask them to post a comment with a link to the post. It's clunky as fuck, but it's *something*.

Lastly: how do you make an anonymous comment when you're logged in?
Answer: Middle-click* on the "Reply" link to open it in a new tab. OR click normally and then click "More Options".**
Either method activates this comment box:

Select anon, then you're done!

-------
* If you're on a mac, you might have to control-click, then click "Open in New Tab"
** Thanks, mific! <3
*** On mobile, the Custom Text disappears to the bottom of the page. ¯\_(ツ)_/¯
potofsoup: (Default)
[DW for tumblrites masterpost]

Okay, we all know that DW doesn't actually have likes or reblogs. There's that deceptive little heart under each post, but when you click it, it starts yelling at you about "memories".

BUT! Take a moment and think about what you use likes and reblogs for on tumblr. There actually *are* ways to replicate a lot of those specific functions on DW. Often not elegantly, but in a way that is doable.

So below I divide Likes and Reblogs into their constituent functions, and show how you'd do that on DW.

LIKES

To quickly show appreciation for something without typing up an extensive comment:
The way to do this on DW, is to click "Reply", which brings up the in-page comment box, and then typing "<3". It's 3 clicks instead of one, but I find it very do-able.*

Is commenting with <3 a social norm here? Frankly, I don't care if it isn't. I'm going to do it anyway, especially for public entries of tumblr expats. I'd love it if we can standardize on something like "<3 doesn't need replies", so that people commenting don't feel like they're imposing on the creator, and the creator doesn't feel obligated to respond to every single <3.

To "save" a post for viewing or reblogging later:
For this, use Memories! Yes, click that deceptive little heart icon. Memories on DW is actually a bookmarking system for DW posts. You can add 5 tags to each bookmark, and you can then browse through your bookmarks by clicking on "Memories" on your profile:


They are public by default, but if you're used to having private likes on tumblr, remember to set privacy when making the bookmark.


REBLOGS
Before we get into the meat of "alternatives to reblogging," I want to point out that DW has a culture that is centered around privacy and control of content, so be very mindful that most people are writing things here *not* intended for tumblr-style reblogging, and in fact, many posts are designed to be protected, not shared.

That said, reblogging is a core way people interact on tumblr, so let's start by figure out *why* our fingers itch to hit the "reblog" button:

To save something so you can find it later:
Use Memories and tag it. (See above)

To add to the conversation:
- Click "Reply", and type up a quick comment! DW automatically emails you if someone responds to your comment, and you can actually reply to that email to automatically add to the comment thread. (I love comment threading so much)
- It's *totally okay* to comment on other people's comment threads! If you see an interesting comment, you can add on to it, the way if you see an interesting post, you'd reblog and add on to it.
- If there's already a large number of comments on that post, I suggest middle-clicking on that post to open it up in a new tab and read through existing comment threads.

To share a cool thing with your followers:
I think the current social norm is to make link round-up posts where you basically paste in the links from all the open tabs you have, writing a short sentence for each one. I sometimes first save as memories, and then gather those links into a Roundup post.

BUT: Since I'm coming over from tumblr, I'm actually fine with shorter, more frequent posts, so here's what I plan to do: When I'm scrolling through my Reading Page, I'm going to have a blank post open in a separate tab. If I see something that I would usually "reblog-to-share" on tumblr, I'm just going to pop a link to that into my blank post, write a quick blurb, and post it. That link could be to a post, an external page that someone shared, or to a specific comment thread or tag. The key here, for me, is that it's (a) fast, and (b) short. One of the things that made tumblr work is that information spread at at 6-12 hour cycle instead of at a 3-5 day cycle.

I think this quick link-posting system, while kind of awkward, will
(a) scratch the reblog itch by encouraging near-instant shares,
(b) speed up the pace of information on DW,
while simultaneously
(c) not spamming people's Reading Pages with a bajillion copies of the same thing, and
(d) prioritizing your thoughts about the link instead of burying it in the tags.

Am I blatantly proposing ways to change existing DW norms in this "how-to" post? Yes. But it's a how-to post for tumblrites, about something very quintessentially tumblr. ¯\_(ツ)_/¯ I personally think we can inject some of that energy into DW without breaking the more long-form journaling aspects that I love so much here.

So: Pop a link into a blank post, write a quick blurb, and post it. That link could be to a post, an external page that someone shared, or to a specific comment thread or tag. The key here, for me, is that it's (a) fast, and (b) short.

Format would be: [user] made [a post about blah].

Here's how the html would look:
<user name="USERNAME"> made <a href="POST LINK">a post about blah</a>.

Edited to Add:
1)

[personal profile] astolat made a SignalBoost bookmarklet

It's one-click reblogging from the post! It allows you to reblog with a snippet, too, but as usual, err on the side of caution for that. :)
I'm on Firefox and it took me a hot minute to figure out how to actually edit the URL -- you have to go to "Show All Bookmarks" and not just "Edit This Bookmark."


To add to a conversation AND share it at the same time
On tumblr, the solution is to reblog and add to the bottom. This leads to a lot of Dash filler if it's an active conversation. On DW, I think we're fortunate in that there's more of a choice:
- You can comment on a post and then post a link to that comment thread.
- You can link to the original post and write your response on your own blog, and then share a link to your post in the comments of the original post.

I think I prefer linking to a comment thread if I want to be part of the same conversation. But if it's something that is a few steps removed from the original post, and also something that I want to start my own conversation on my own blog, I'd use the latter.

Formatting "reblogs"
For about 90% of the time, I think a quick "[user] made a post about blah: [link]" is sufficient. However, sometimes you may want to include a snippet of someone's post in your reblog post -- maybe to highlight a particular point that you want to point people to.
[personal profile] shy_magpie suggested a way of formatting reblogs, which is basically putting the quoted snippet in a <blockquote> tag.

Here is an example of what it looks like:

[personal profile] potofsoup, in her Likes and Reblogs post, said:
blah di blah blah blah
(note: blockquotes show up differently on different styles, so don't rely on it always looking the same)

Be mindful that many people don't want their posts quoted, especially ones intended for a private audience. So before including a snippet, consider a few things:
- Is the post private? (there's a little lock icon next to the title of the post) If so, don't share any part of it
- Is the content of the post personal? If so, it's probably not intended for a wider audience.
- Are you still directing people to the original post and the comment threads there?
- Is your snippet short enough to count as "fair use", or can it be seen as you're stealing other people's content wholesale and reposting? (Even if you provide a link back, it's still reposting.)
- Instead of quoting a snippet and adding on, can the same thing be achieved by linking to the comment thread with a short blurb about what you said?

I'm a tumblr-ite so you have blanket permission for me, but when in doubt, double-check!!

Reblog starter snippet
You can help facilitate link-share style "reblogs" by providing some pre-formatted text snippet for people to copy-paste into their post. Anything enclosed in a creating a <textarea> like above is raw code, which people can then copy-paste into their post and then edit/append their own blurb.
  • Here's the formatting again: <user name="USERNAME"> made <a href="POST LINK">a post about blah</a>
  • It feels weird to pre-include the post snippet that you want people to reblog, so... maybe not?
  • Keep in mind that these "reblogs" *are* editable, so we're dependent on social norms to make sure things aren't mis-attributed.
  • Reblogging Images: it is bad form to repost a copy of my image, especially with hotlinking. However, we need to visual to help bring attention to the link. So:
    • The artist can create a reblog snippet that includes an image thumbnail that they're comfortable with. That can be a new thumbnail that they resize and upload, or it can just be a version of the image with a width="200" included in the image tag. See example of reblog here: https://potofsoup.dreamwidth.org/24967.html
    • If the artist didn't include a thumbnail, I think it's worth asking the artist if you can reblog with thumbnail.


    If your reblogger want to help facilitate the spread of your post, they can simply paste the reblog snippet a second time and put it inside another <textarea> </textarea>.

    Notifying and tagging reblogs
    One thing that's I miss is knowing that someone reblogged my stuff. What I've been doing is leaving a comment on the person's post that I'm reblogging it, and linking to the reblogged post if possible.

    Reblog starter snippet:


    -----------
    * There's a more complicated way which involves the poster making a poll that lets you click "<3", but it's a paid feature, and I find that slower than just dropping a quick comment with a <3.
    * Edited on Jan 8, 2019 to better highlight respect for privacy and existing comment norms.
  • potofsoup: (Default)
    [DW for tumblrites masterpost]

    "Access" is something that I didn't want to talk about too early, because (a) it's complicated, (b) "access" is such a dumber name than "friends only" and (c) it's about privacy-locking your posts, but tumblr is basically all-public, all the time.

    But unfortunately, every time you want to follow someone by subscribing to them, you get this lovely screen here:


    And then people are like "Which do I click? Do I click both?" It's a bad place to have a decision paralysis, and frankly, makes joining DW seem much more daunting than it actually is.

    So, let's talk about it:

    "Subscribe" means "follow", in the sense that we're familiar with: you see their posts on your Reading Page/Dash. On most platforms, that means *all* of their posts, because most platforms are all public. But on DW, there's the option of "friends-only" posts. When you "Grant Access" to someone, that means that they can read your friends-only posts. "Join" applies to communities, and it means you can post there, and your posts show up on its reading page.

    ExpandHere are some examples: )

    UGH, SO CONFUSING.

    If you're coming from tumblr, here's the way to think about it:
    - If your blog is mostly for the public (an artblog, rec blog, etc): then do whatever the heck you want. Grant Access to people as a way of reciprocating, but let's be real: you're not going to be locking any of your posts. (And even if you were, you can set up advanced access lists later)
    - If your blog has stuff about your personal life and feelings: only grant access to people who you feel comfortable reading those things.

    Great! Now when you want to talk about Real Life or whatever, you can friends-lock your post by choosing "Access List" from the drop-down before posting:


    Actually, Access Lists are much more powerful when you fine-tune it for specific audience groups. See that "Custom Filter" option in the drop-down? Here's what happens when I click on it:

    (This is from my personal account, so most of the filters are to filter out my mom. XD;;;)

    ExpandCustom Friends-lock filters )
    potofsoup: (Default)
    [DW for tumblrites masterpost]

    This time I want to talk about 2 of my favorite features of DW, which also happens to be ... rather hidden, especially if you're coming from tumblr-verse. Both of these help make your Dash (Reading Page on DW, but I'm going to keep calling it the Dash) more readable.

    1. Sorting your Dash into Groups
    You know that thing that happens when you're scrolling through your tumblr dash and it goes from cute kittens to gorgeous fandom art to political news, and you get major mood whiplash? Or that thing where you are short on time and you just want to quickly check what your mutuals have posted? On DW, you can actually organize the people you follow (subscribe to) into different groups! You can create a "cute animals only" group, or a "mutuals" group, or whatever you want.

    For example, I have a "comics", a "news", and a "Default" view, and I can toggle between them via the grey bar at the top:
    ->

    Another thing that's great: each blog can exist in multiple groups! So I can have a mutual appear in an "artblogs" group, a "mutuals" group, AND my "Default" group.

    This system has been around for probably 20 years, which means:
    - It is all curated by YOU, not robots who pick what's "relevant" to you based on your data
    - It takes a bit of effort to set up

    ExpandSo lemme show you how to do it )

    2. Importing RSS Feeds from other sites
    Now, you may notice that on my comics filter above, I have some blogs that end in _feed. That means they're not native to DW, but rather, imported in via the RSS feed. Yes! DW functions as a rudimentary feed reader.

    Here's a screenshot of the beginning of my feed list:

    Out of the 70 feeds I'm following, there's BBC news, AO3, a slew of webcomics, my husband's Mastodon, and a few friends' tumblrs.

    TUMBLR?!!!
    Yes, you can import RSS feeds from tumblr blogs. But before I get to how, a few notes:
    1) Importing RSS feeds costs DW Server Effort. They're offering it for free rn, but I want to be considerate. So ... I can't stop you from importing a tumblr that updates 100 times a day, but ... please don't? I suggest people who post <10 times a day: artblogs, fandom event blogs, and mutuals who you really want to stay in touch with.

    2) Caveats/Limitations: The RSS feed doesn't include tags or notes. A lot of tumblr happens in the tag subtext. The RSS feed gets imported on DW's schedule, which is once an hour, I think? Also, there is a post limit. Anything more than 40 posts or 1 month or smth gets automatically vanished.

    3) That said, a fun thing about importing an RSS feed to DW is that it creates the RSS feed as a journal, which means you can actually comment on the content of the RSS feed, with whoever else is subscribed to the same feed.

    All right, with those notes, Expandhere's how to set up feeds )

    Lastly, you should know that which feeds you're following is shown in your Profile, along with blogs you subscribe to, etc. That's a handy way for people to find blogs to follow, but it's also currently public info. ¯\_(ツ)_/¯
    potofsoup: (Default)
    [DW for tumblrites masterpost]

    Is there a way to make drafts on DW?
    Yes, but not well.

    Let's start with the simple stuff:

    If you leave some text in the "Post" box, it is auto-saved.
    This means that you can start something on mobile and finish it up on the computer, or start something at home and finish up at work.

    But there's no official way to save posts as drafts.

    So here is my solution:

    Create private posts with forward-dating. Then copy-paste into a new post when ready to post.

    There's a lot to unpack there, so let's go step by step.

    I've already talked about post privacy here. But if you make a post as private, you're the only one to see it.

    Editing the date:
    You can edit the date of every post, by clicking edit date in the top area above the posting box:


    You can set the date to any day, past or future, and you can choose whether it shows up in your reading page. There's also a checkbox of whether you want it to show up in your followers' Reading Page / Dash or not.

    AND: you can view all of the posts for a specific day by going to the page for that date, either by going to your calendar or going directly: https://potofsoup.dreamwidth.org/2018/12/11/ is for Dec 11 2018.

    THIS IS SUPER HELPFUL for hiding and finding private posts. You can create a stash of notes or post drafts to yourself on Jan 1, 2000, and find them by going to yourusername.dreamwidth.org/2000/01/01 (you can try it for me). You can even do a thing like hiding your to-do list on one day, your secret angst on another day, and your post drafts on a third day. :D

    Expandsmall aside about calendar )

    Anyway, all this forward- and back-dating of things works because for the DW system, there is a difference between your Entry Date and your Posting Date.

    The calendar and your own blog displays things by Entry Date, which is why forward-dating something puts it at the top, and back-dating puts it at the bottom. BUT, the Reading Page displays things by Posting Date. So even if you forward-date an entry, it still shows up on the reading page at the time that you posted it. And if you posted something a long time ago as a "private post" to save it as a draft, the posting date is still in the past.

    This means 2 things:
    1) When you are porting a lot of stuff over from tumblr and stuffing it into the archives via backdating, you need to decide whether you want it to show up on your followers' Reading Page or not.

    2) When you are reading to post something from your Secret Drafts Area, you need to copy-paste the text of that draft and post it as a new post, so that it has the right posting date.

    So, like most things on DW: doable, but not elegant.
    potofsoup: (Default)
    [DW for tumblrites masterpost]

    So, I was really nervous about moving to DW because DW image hosting isn't that great, and I care a lot about images. But it turns out... well, it's not that great, but it's not horrible.

    First, the bad news: there's no way to organize your images, everything just gets thrown into a slush pile. There's also no way to resize your images directly after upload*, so you'd probably have to use something like https://resizeimage.net/ in a pinch. Also, you can't hotlink to AO3. (Although maybe we should suggest that at [site community profile] dw_suggestions

    Now, the good news: 500MB isn't bad (~1000 images if used wisely), and uploading and embedding images isn't that bad!

    To upload images, you go to Organize -> Manage Images. That takes you here:


    Then you click on "Upload new images", which takes you to a fairly decent image uploader. It's just https://www.dreamwidth.org/file/new , which isn't that hard to remember, either.

    After you upload the images, they automatically show up on the same page. From there, you can either use their existing code, or just grab the bit in the html that has the image file:


    I usually prefer just grabbing the image file name and making my own image tags, since it's actually faster than editing theirs. You can see the size of the image right next to the image, which may help you decide which of the following snippets to use:
    To post an small image: <img src="image link">
    To post an big image: <img src="image link" width="100%">
    I write more about HTML here: https://potofsoup.dreamwidth.org/3473.html

    So my workflow is: Go to /file/new --> Upload images --> Open new tab and load up new post --> copy image links into img tags while writing post.

    There's also an option for using their code that generates a thumbnail. You can choose which thumbnail size you want, but I don't really care about that.

    And if you're cross-posting, you don't have to re-upload the image, you just copy-paste your journal entry and then you're done.

    Edit to add:
    Just be aware that DW doesn't allow hotlinking your images (unless it's to LJ), so if you want to post your images to AO3, you need to find a different image hosting. [personal profile] absolutedestiny walks you through image and large file hosting on the cheap with Backblaze B2:
    https://absolutedestiny.dreamwidth.org/190827.html **
    Basically, if you store < 10gb total and use < 1gb per day, it's free.

    -----------
    * But they have tagging and rudimentary resizing for icons, so I think more advanced may be coming down the pipe. *Especially* if more image-friendly tumblrites start using DW more. I see their current set-up as a precursor to some sort of tagged gallery system
    ** There's a lot of context at the beginning, and the last 3rd is totally optional stuff, but the middle walks you step-by-step through the process of uploading and finding the file link. If you're looking for a quick walkthrough, start at where it says "Part 1 - Storing the Files on the Cloud with Backblaze B2".
    potofsoup: (Default)
    [DW for tumblrites masterpost]

    Here are 3 places to go to start posting:
    - when you sign in, the home page has a quick posting box
    - on any page, go to the top bar and there is a "post" button
    - You can go to the "Create" Menu and select "Post Entry"

    Look at the stuff at the top above the box:

    - You can choose whether to post to your blog, or to one of the communities that you've "Joined"
    - You can select icons, or backdate (or future-date) things.
    - On the right-hand side, there's 3 links to help you with HTML!

    The stuff below the posting box allow you to fine-tune your settings and tags.

    In the posting box, they auto-format new lines (whenever you hit "Enter"), as well as any links that start with http. (So dreamwidth.org doesn't get magically linked, but http://dreamwidth.org does.)

    Quick Start Guide
    To create the little username linky, you do <user name="username">

    To make a cut, you put this at where you want to cut to start: <cut text="teaser words for the cut">
    And you put this when you want to end the cut: </cut>

    To make a link: <a href="website link">link text for clicking</a>

    To post an small image: <img src="image link">

    To post an big image: <img src="image link" width="100%">


    Finally, before I launch into some HTML basics, I want to point out the Rich Text Posting:


    Basically, if all of this html stuff scares you, you can literally use tumblr as a way to draft your post, then copy the whole shebang and paste it into the Rich Text view. It'll come out looking a tad funky, but it *works*.

    Anyways, onto HTML basics:

    Note: these are the quick-and-dirty html stuff. We're pretending that CSS doesn't exist, and that half of these tags aren't "deprecated" -- hey, it works, right?

    ExpandWhat are HTML tags? )

    ExpandOkay, so here are some basic tags for styling words:  )

    ExpandBut wait! Images and Links are also tags! )

    DW-specific tags: the CUT and the USER NAME
    Finally, I want to go into a little more detail about the DW-specific tags.

    The <user> tag can take the "name" and the site attribute:
  • <user name="potofsoup"> becomes [personal profile] potofsoup
  • <user name="potofsoup2" site="tumblr"> becomes [tumblr.com profile] potofsoup2
    (remember that you click the name to go to their blog, click the little person icon to go to the profile, and hover over the little person icon for a menu of helpful links)

    The <cut> tag has the optional attribute of "text", which allows you to change whatever you want the cut tag to say. REMEMBER TO CLOSE THE CUT TAG. That way, a post can have multiple cuts:
    ExpandRead more... )
    Expandthis cut has specialized text )

    A few things to note about cut tags:
    - If you click on the little triangle next to the cut link, it opens it up in-page. If you click on the link itself, you leave the reading page.
    - The blog post direct link doesn't show any cut tags
    - The link text you put in your cut tag doesn't actually show up in your post. So often I do this: <cut tag="Read this:"><b>Read this:</b> so that if someone is reading the post directly, they won't be confused by the sudden topic change.
  • potofsoup: (Default)
    [DW for tumblrites masterpost]

    All right, we all know how to do it on tumblr -- you come across a cool reblogged post, you hover over the person's icon, you click follow. Or maybe you type a ship name or character name into the search bar, look through the posts that come up, and follow blogs that way.

    DW doesn't have universal search by tags, so what can you do?

    I'm pretty new to this myself, since the last time I used DW, it's to follow real life friends, but here's how I'm approaching it:

    1) You can search for blogs by their tags.
    So, instead of posts getting tagged, it's the journal or community that gets tagged. It's not obvious, because the box is labeled "Interests", and when you're filling out your profile, you might have been like "whaaa? I like... cheese?" But actually, your comma-delimited list becomes what are essentially tags. And that becomes searchable in the site-wide search box at the top!

    For example, the first thing I did after moving here from tumblr, was to type "Captain America" into that box. (You can type multiple tags, too.)

    That brought up 1700 results, listed in the order of "most recently updated", which is great for filtering out the abandoned blogs or comms:


    There's a link there for just showing the communities, and if you click that, you can see that there are some active communities. (Which you can make more active by joining and posting!)

    This brings up a corollary:
    1b) Make yourself findable!
    Go edit your profile and make sure that you list tags that people might search for, and also know that the more recently you've updated, the higher you'd show up in the search results.

    2) Stalk other people's profiles and reading pages
    People's profiles list the people, comms, and feeds that they follow, which is a good way to find new interesting blogs that you may not think to search for.

    Also, did you know that you can read other people's Dash? For example, you can see what my Dash looks like by going to http://potofsoup.dreamwidth.org/read .
    (Note: your view of their dash may not be theirs, since (a) they might be seeing locked posts, and (b) they can tweak the dash that via subscription filters.)

    3) Join/Subscribe to communities
    Communities are interesting and have a bajillion uses, ranging from fandom events to kinkmemes to discussion forums to announcement boards, but if you're coming from the tumblr-verse, one of the many ways it's used is actually as... tags. Whaaa???? Okay, hear me out: instead of tagging your post "Stucky" and hoping that someone else finds that post during a tag search, you join a "Stucky" community and post your thing there. Then everyone who is subscribed to that Stucky community sees that post. (translation: everyone following the "stucky" tag sees that post.)

    Joining a community usually lets you post there. Subscribing to a community puts its posts on your Reading Page (Dash). The community has its own "Reading Page", which is basically the posts of all of the members of the community -- another good way to find people!

    Of course, it's not that simple:
    - Communities all have their own rules and expectations, and you don't want to run in and post willy nilly
    - Communities also suffer from some of the discoverability challenges of DW
    - If you are posting to the community (which is a simple pull-down selection when making a post), it means the post doesn't go on your own blog. Which means you have to post on your own blog, and also cross-post to a bunch of communities. It's an extra hassle, which I'm hoping DW might improve in the future.
    potofsoup: (Default)
    [DW for tumblrites masterpost]

    Hi! I'm going to make this a series of quick posts to help explain DW for tumblrites.

    Let's start with translating some terms:

    TumblrDW
    blogjournal
    shared blogcommunity
    followSubscribe
    dashReading Page


    So, if you find someone you want to follow, you click on "subscribe" or "Add to your circle". Then this person's posts would show up on your Reading Page, which is just yourblog.dreamwidth.org/read.

    For the sake of this post, I'm going to keep using the tumblr words.

    Where can you find the subscribe/circle button? Here are a few places:
    - When you visit a person's blog:
    ---> There should be a bar at the top where there's either "Add to your circle" or "Subscribe", depending on whether it's a community or a journal.


    ---> There's usually also a series of buttons under their profile picture on their blog, and one of them is "subscribe".


    - Whenever you see something like [personal profile] potofsoup, you can hover over the little person icon to get a box that has "Subscribe" in it. (yes, you can hover over that one, right now)

    - If you have a bunch of follow notifications and want to bulk edit, you can also go to the Manage Circle page: https://www.dreamwidth.org/manage/circle/edit and check off some boxes there and hit save. (It's found under the "Organize" menu)

    Most of the time, that takes you to this page with 2 giant red buttons: Grant Access and Subscribe

    - Grant Access means that they can read any locked posts that you have (I'll talk about that in a separate post)
    - Subscribe just means that you want their posts on your dash (er... Reading Page).


    Yay, now you've followed that person and can read their stuff on your dash! (er... you've now subscribed to that person and can read their stuff on your reading page!)

    Profile

    potofsoup: (Default)
    potofsoup

    About

    #me
    #mine
    AO3
    Patreon
    Storenvy
    potofsoupyfeels at gmail

    Style Credit

    Expand Cut Tags

    Expand All Cut TagsCollapse All Cut Tags
    Page generated Jun. 12th, 2025 12:37 am
    Powered by Dreamwidth Studios